How to Prep a Wooden Deck for Staining
Does your deck look a little worse for wear? If so, it may be time to restain the wood to get your outdoor living space looking fresh and new once more. Before you restain your deck, it’s important to prepare the wood carefully so you can achieve a smooth, even finish. For most decks, that preparation involves stripping the old finish and cleaning the wood so it’s ready to accept the new stain. Explore this step-by-step guide to learn how to prep a wooden deck for staining so it’ll last for years to come.
Gather Supplies
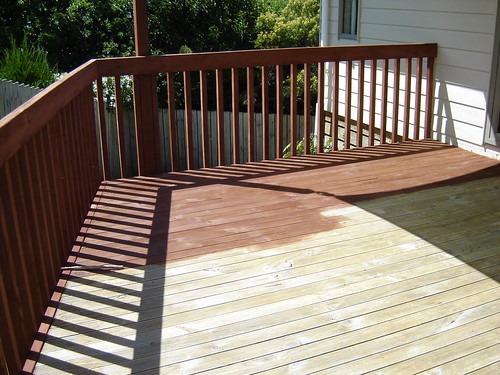
Staining the Deck by Yortw is licensed with CC BY 2.0
Before you begin this project, gather the supplies you’ll need for the job. Having everything ready can help you work quickly to get the deck prepared for a new stain. Here’s a list of supplies for this project:
- Drop cloths or tarps.
- Broom.
- Protective eyewear and gloves.
- Deck stripper.
- Half-inch or three-quarter-inch nap paint roller with extension pole.
- Paint tray or bucket.
- Stiff-bristle brush or broom.
- Garden hose or pressure washer.
- Wood cleaner.
- Pump sprayer.
- Scrub brush.
- Sanding pad or orbital sander with 150-grit sandpaper.
Choose the Right Time
Once you’re ready to work, choose the right time to strip and clean the deck. Make sure there’s no immediate rain in the forecast. If possible, complete the prep work on a cooler Southern California day when temperatures are below 90 degrees with low humidity. This type of weather allows the deck stripper and cleaning solutions to work evenly without drying too quickly.
Prep the Deck Area
Remove all furniture, plants or flowers, and other items from the deck so you have access to the entire space. Use a broom to clear off dirt, leaves, and other loose debris. If you have an older deck, take this opportunity to inspect it closely for damaged wood, warped boards, or loose nails. It’s easier to replace boards, screws, or nails before you continue with stripping and cleaning the deck.
As a final preparatory step, use drop cloths or light tarps to cover plants and bushes around the deck for protection. You can also use a garden hose to mist the deck siding and other nearby surfaces, which can prevent damage if the deck stripper splashes onto those areas.
Strip the Old Finish
If you’re restaining your deck, it likely already has an existing finish that you’ll need to remove using a deck stripper. Before using it, make sure you protect your eyes and skin with quality eyewear and gloves. Follow the instructions on the bottle to prepare the deck stripper and pour it into a paint tray or bucket. Using a half-inch or three-quarter-inch nap paint roller with an extension pole, apply the deck stripper to the surface of your deck in small sections. Use thick, liberal coats in an even consistency.
Depending on the deck stripper you use, it may need to set for a specific amount of time, such as 15 to 45 minutes. During this time, watch closely to make sure the stripper doesn’t begin to dry. If it does, lightly spray those areas with water to keep them wet.
After the allotted time has passed, begin to scrub the deck with a stiff-bristle brush or broom. You may need to go over areas more than once to ensure you strip the old finish entirely. If your deck has a thick layer of stain, you may need to let the deck dry and then reapply additional deck stripper to repeat the process. Once you’ve fully removed the finish, use a garden hose or a pressure washer on a low setting to rinse the stripper and loose stain.
Clean the Deck
Next, neutralize the deck stripper and clean the deck to prepare it for a new stain. Mix the wood cleaner in a pump sprayer according to the manufacturer’s instructions. Typically, this step involves mixing the cleaner with equal parts water. If you have very old deck boards, you may want to use a higher concentration of cleaner.
Before applying the cleaning solution, lightly wet the deck using a garden hose. Then, use the pump sprayer to apply the wood cleaner to the entire deck. Make sure you cover every portion of the deck to neutralize the stripping agents entirely. Let the cleaner set for the recommended amount of time, and lightly mist areas if needed to ensure it doesn’t dry fully. Once the cleaner has set, use a brush to scrub the deck. Then rinse it off with a garden hose and allow the deck to dry completely.
Sand the Deck
After the deck has fully dried, use a sanding pad or orbital sander with 150-grit sandpaper to remove any patches of stain or finish that may remain. If you’ve replaced any deck boards, sanding them can also help remove residue. Finally, lightly sand the entire deck to ensure a smooth, even finish for your new stain. Once you’re finished sanding, you can use a broom to sweep up the sanding dust and other particles. Now you’re ready to apply a new stain to your deck to make it look as good as new.
Restore Your Wood Deck in Southern California
Now you know exactly how to prepare your wooden deck for a new stain. Though not a tough project, it does involve some time and labor, and it may be more appealing to have someone else do it for you. At Teak Master, we have nearly 20 years of experience restoring wood decks in Southern California, serving customers in Los Angeles, Orange County, and Ventura.
Our experienced team knows exactly how to prep and restore your deck to make it look like new. We use high-quality products and detailed processes to achieve optimal results on all types of wood decks, including cedar, mahogany, ipe, teak, redwood, and others. If you’re tired of looking at a dull or damaged wood deck, call or email us today for more information on our restoration services. We’re ready to work with you to revive your outdoor space so it looks beautiful once again.