How to Stain a Deck for the First Time: Our Step-by-Step Guide
Staining your deck is an essential part of maintaining its health and beauty. While the process might seem daunting to a beginner, with the right tools and instructions, staining a deck can be a rewarding DIY project. Here’s a step-by-step guide to ensure you achieve a professional finish when staining your deck for the first time.
Choose the Perfect Weather Day
Deck staining requires specific weather conditions. It shouldn’t be too hot, cold, or humid. Ideally, select a day with temperatures between 50°F and 90°F without any forecasted rain for at least 24 hours. This ensures your stain adheres well and dries evenly.
Gather Necessary Supplies
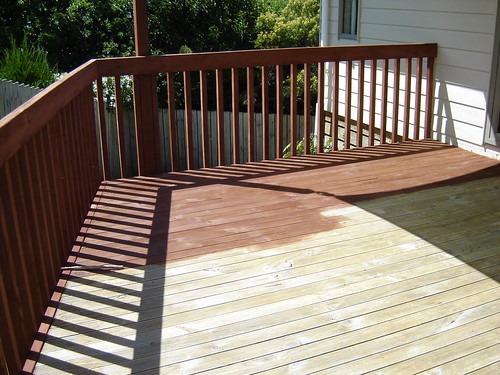
Staining the Deck by Yortw is licensed with CC BY 2.0
Before you begin, gather the following supplies:
- Deck stain: Whether you opt for an oil-based or water-based stain largely depends on your deck’s material and your desired finish. Do your research or consult with a specialist to determine the best choice.
- Deck cleaner: This isn’t just soap and water. A specialized deck cleaner will help remove older finishes, mildew, and deep-seated dirt.
- Painting Tools: Depending on the size and intricacy of your deck, you might need paintbrushes for detailed work, rollers for broader areas, or even a sprayer for vast and open spaces. Remember, each tool will give a slightly different finish, so choose wisely.
- Safety Gear: Safety first! Always wear gloves to protect your hands from chemicals, goggles to safeguard your eyes, and a mask to prevent inhalation of harmful fumes or dust.
Prepare Your Workspace
Remove all furniture, plants, and other items from your deck. If you’re concerned about the surrounding plants, cover them with plastic sheets or drop cloths. This will protect them from any stray stain splatters.
Clean Your Deck
Over time, your deck accumulates a lot of dirt, mildew, and perhaps even old stain or paint. A clean surface ensures the stain adheres properly. Start by sweeping off any loose debris. Use a specialized deck cleaner and a stiff brush to scrub every nook and cranny. If your deck is particularly grimy, consider renting a power washer. However, be careful with the pressure settings as high pressure can splinter or gouge wood.
Sand if Necessary
After cleaning, feel the deck’s surface. If you find any rough patches or splinters, it’s a good idea to sand the deck. A pole sander or an orbital sander with 60- to 80-grit sandpaper works best. After sanding, sweep or vacuum the deck to remove any dust.
Mask & Protect Surrounding Areas
Use painter’s tape to mask off areas where you don’t want the stain, like house siding or wall edges. Also, put drop cloths or plastic sheets on the ground under the deck to catch drips.
Begin Staining
Pour the deck stain into a paint tray. If you’re using a paintbrush, dip it into the stain, letting the excess drip off. Before covering the entire deck, test the stain on a small, inconspicuous section. This gives you an idea of the final look and allows for any adjustments in technique or color choice. Start applying the stain to the deck boards, using long, even strokes. Work in small sections, ensuring you cover each board from end to end without stopping. This ensures a consistent finish.
For large decks, a roller or sprayer can save time. However, it’s crucial to back-brush, which means going back over the wet stain with a brush to even it out and ensure it penetrates the wood.
Apply a Second Coat (If Needed)
Depending on the product instructions and the look you desire, you may need to apply a second coat. Always read the manufacturer’s guidelines. If you decide on a second coat, wait for the time recommended by the manufacturer before applying.
Let it Dry
Once you’ve applied the stain, allow the deck to dry completely. This can take anywhere from 24-48 hours, depending on the stain type and weather conditions.
Clean Up the Area
Clean your brushes, rollers, or sprayer immediately after use. If you’ve used a water-based stain, soapy water is usually enough. For oil-based stains, you’ll need mineral spirits or paint thinner.
Maintain Your Deck
Even with a quality stain, your deck will face wear and tear. Regular cleaning and occasional touch-ups or re-staining will keep it looking fresh and vibrant.
Need Expert Help With Your Deck Refinishing?
Staining a deck requires time, effort, and attention to detail. If you find the process overwhelming or want a guaranteed flawless finish, it might be time to call in the experts. Teak Master has been serving the Los Angeles and Orange County areas for years, offering top-tier deck refinishing services. With an experienced team at your disposal, you can be confident your deck is in safe hands. Don’t wait – contact Teak Master for all your deck refinishing needs.