Tips for Restoring a Painted Wood Deck
If your home has a wooden deck attached, consider renovating it before the summer months set in. As the weather warms up, you might feel like spending more time on your deck. If you have a painted deck, now could be the perfect time to restore it. Whether you want to revert to a natural appearance or you’d like to repaint the deck, there are a few steps you can take to completely overhaul its appearance. Here’s how to restore a painted wooden deck with a new stain or color to make it look fresh and updated.
Take Time To Prepare Your Work Area
Before you restore your deck, you should inspect the condition of the wood. Paint can hide signs of rot and damage, so you may need to conduct a closer examination of each beam. You can also check the screws and nails to ensure they’re still tightly in place. Now is also the perfect time to make any necessary repairs to your deck, especially if you plan to repaint or seal it as part of the restoration process. You should replace rotted boards and loose screws or nails first.
If you notice rust or loose joints and screws, you might have some drainage issues to address. That could be one reason why your paint has started to peel. Make sure that your restoration project goes according to plan by ensuring that any excess water has a place to go using flashing and spacers.
Now is also a good time to identify any other potential reasons your paint is flaking or peeling so you can avoid the same problem in the future. For example, the existing paint’s quality may have been less than stellar, or perhaps the application method was inadequate. Dirt and moisture are also common culprits. You can address these issues by looking for sources of problems, such as leaky gutters or sun exposure.
Remove the Paint Completely
One essential step in the deck restoration process is to remove the paint completely. You may want to use a scraping tool or a brush with stiff bristles to remove all traces of paint. The next step is to sand the painted deck, evening out the surface of the wood. For a painted deck, you may want to first use sandpaper with fine grit so you don’t cause any damage to the wood.
After you sand your deck, consider hosing it down. Some people choose to power wash their decks, but this does have the potential to damage the wood if you don’t use a gentle setting. If you want to be cautious, you can simply use a hose to rinse away any debris left behind after sanding. Let the deck dry before you take any further steps.
If scraping, sanding, and washing doesn’t work, you have another option: a chemical stripper. Chemical strippers remove weathered paint and stain without the need for sanding in many cases. After applying the stripper, you may need to wait for a while. While you wait, look for signs that the sun might be prematurely drying it. You can help avoid this issue by misting the deck with a fine spray of water every few minutes. After the stripper works its magic, you can use a low setting on the pressure washer to complete the removal.
No matter what kinds of tools or chemicals you use to remove paint, it’s helpful to wear safety glasses and a mask. Wearing protection means you won’t breathe in the paint particles, and the chemicals won’t cause eye damage. In fact, some professionals also recommend covering nearby landscaping to ensure the chemicals don’t kill your plants.
Apply a New Coating With Care
You can apply a new coat of paint or stain using a paintbrush or roller once you’ve sanded down the deck. When you use a paintbrush on the deck itself, you should make sure to use long strokes with an even coating of stain. Remember to always work with the grain, not against it. Once the first coat dries, apply a second to prevent fading and quality issues.
You may find that the painting or staining process is easier if you start with the railings and posts. Use a paintbrush, and make sure to catch any drips right away. This will help ensure you get a nice, even coating.
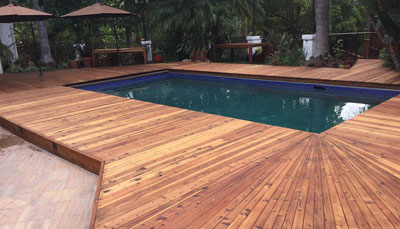
Keep in mind that you can still maintain a natural appearance with a new coating. Transparent and semi-transparent deck coatings can provide protection without changing the color of your restored deck. This will allow the natural grain of the wood to shine through. A transparent sealing is especially helpful if you like the look of natural wood but also want to protect the wood against ultraviolet (UV) rays. UV rays can damage the wood, causing it to warp or become discolored.
Use the Right Paintbrush for the Job
When you apply your new stain or sealant, you might find that a paint pad is the better option, or you can use a paintbrush for more detail. If you’re using a coating with an oil base, you can use a brush with natural bristles. However, if you’re using a water-based stain, you should use a brush with synthetic bristles.
Give the Deck Several Days To Dry
Even if the paint or stain looks dry after a few hours, don’t walk on your deck or bring out furniture for at least a few days. Otherwise, you might cause permanent damage to the color. You may also want to add floor protectors to the bottom of your furniture pieces to keep your new coating pristine for as long as possible.
While many people like to DIY a deck restoration project, it’s not always the right choice. Sometimes a professional can provide the best guidance for taking care of your deck. Contact Teak Master to learn more about taking care of your deck with professional help. The restoration process may be simpler than you think, even if the deck has already been painted.